
The Dialogue Runner (YarnDialogueRunner) is the node that runs your dialogue. You give it a Yarn Project, and it steps through your Yarn Scripts one line at a time. It hands each line and set of options to your Dialogue Presenters, calls your Commands, and keeps track of your variables.
The Dialogue Runner doesn’t show anything on screen. The Presenters do that.
Adding a Dialogue Runner
- Add a
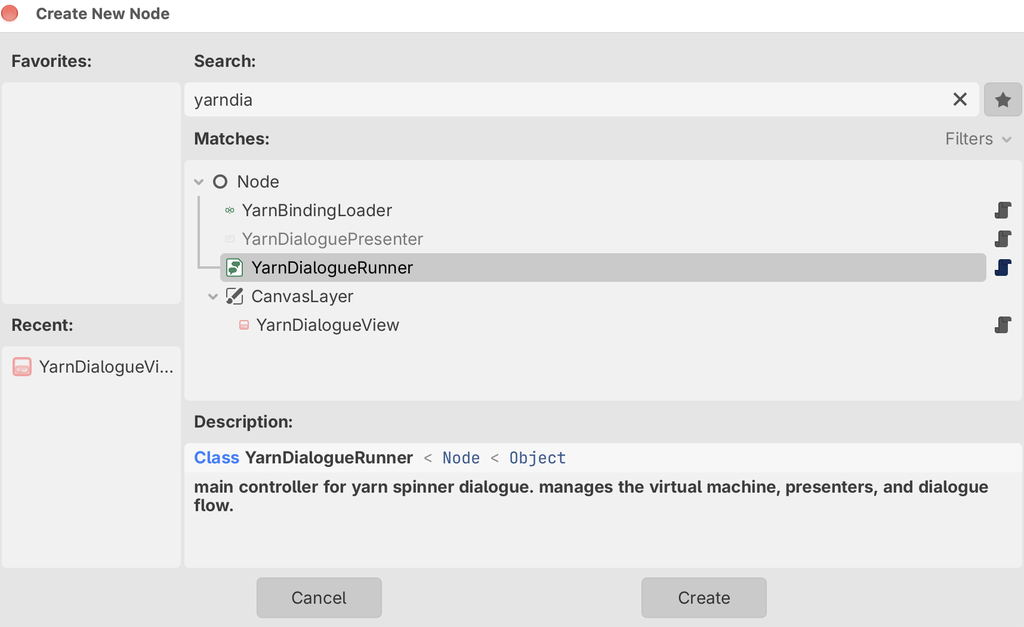
YarnDialogueRunnernode to your scene. Search for it by name in the Create New Node dialog.
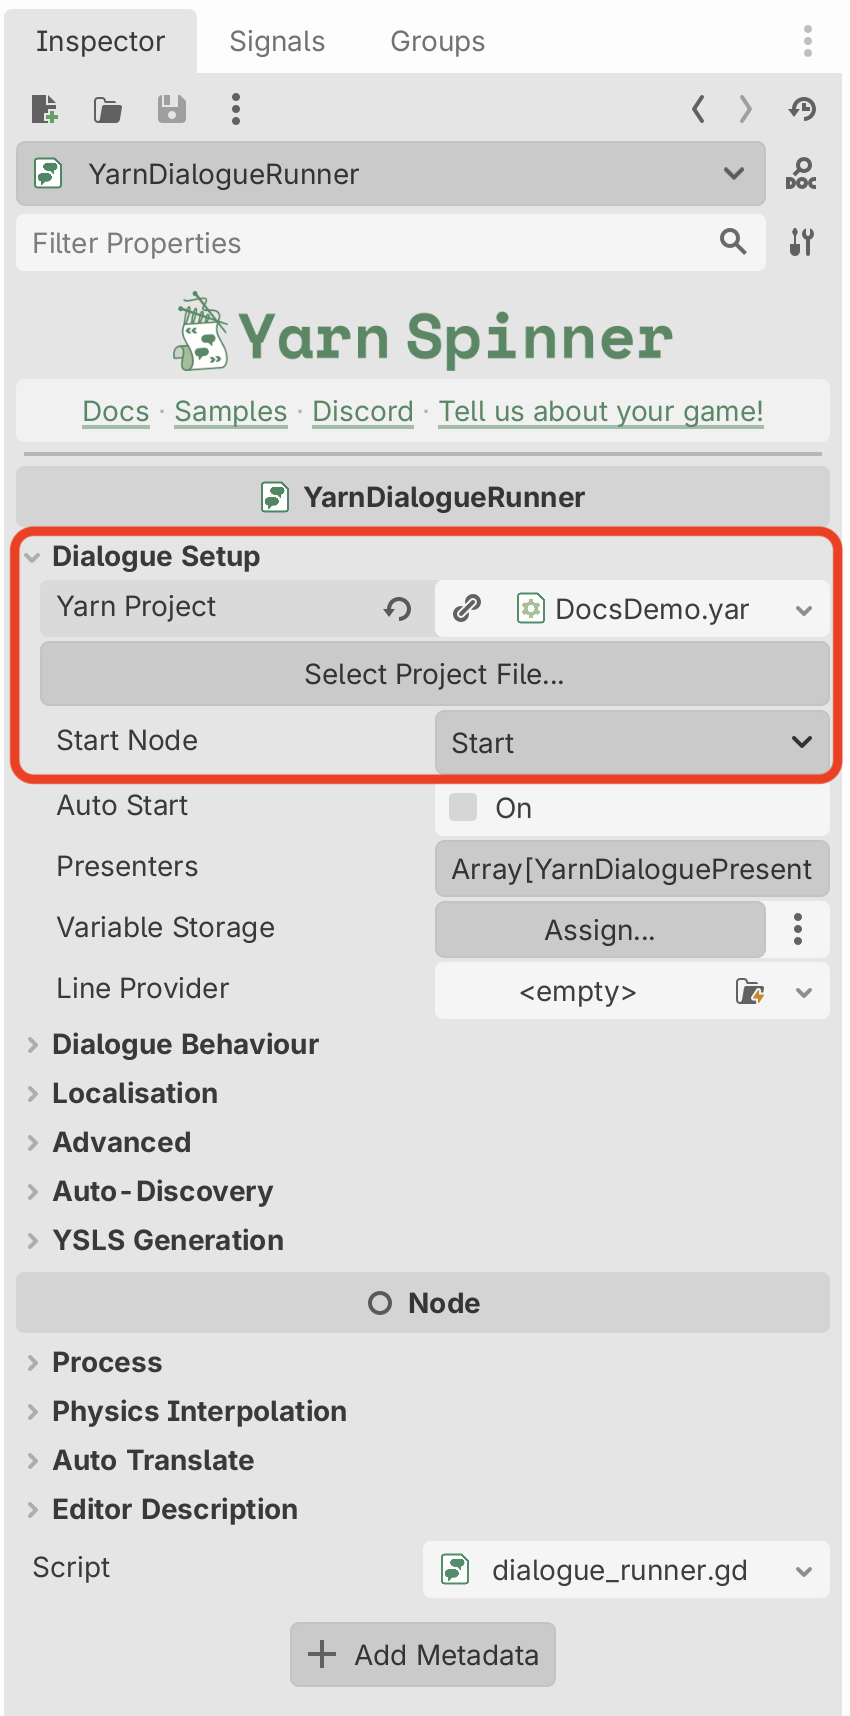
- Select it, and in the Inspector set Yarn Project to your
.yarnproject, either by dragging it in or with the Select Project File… button. - Choose which node to start from in Start Node. It’s a dropdown of the nodes in your Yarn Project, and defaults to
Start.
Most games need one Dialogue Runner. It runs one conversation at a time, so if you need two conversations running at once, such as background chatter while the player talks to someone, use a second Dialogue Runner. The Background Chatter sample does this.
Adding Presenters
The Dialogue Runner can’t show anything until it has Presenters. Most games start with two: a Line Presenter for lines, and an Options Presenter for options. Build this tree:
- Add a
CanvasLayer, so your dialogue is drawn on top of the rest of your scene. - Under it, add a
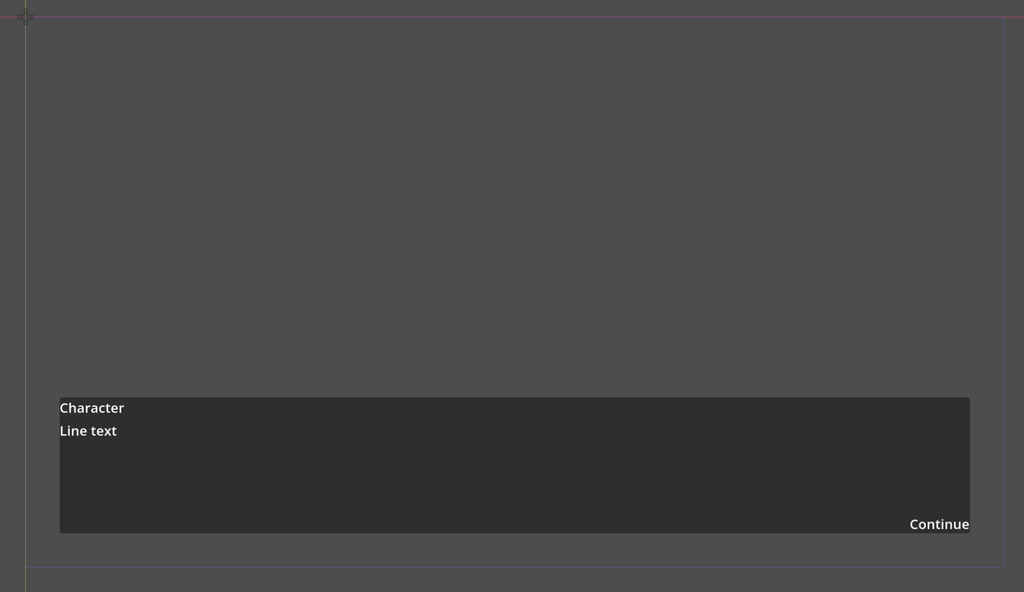
YarnLinePresenterfrom the Create New Node dialog. Give it aPanelContainerchild, with aVBoxContainerinside, and three labels inside that: aLabelnamedCharacterLabel, aRichTextLabelnamedTextLabel, and aLabelnamedContinueIndicator. GiveContinueIndicatorsome text, such as “Continue”. - Under the same
CanvasLayer, add aYarnOptionsPresenter. Give it one child, aVBoxContainernamedOptionsContainer, and leave that empty. The Options Presenter creates a button in it for each option while the game runs. - Position the
PanelContainerand theOptionsContainerwhere you want them on screen, for example along the bottom, and give them a minimum size so there’s room for the text.
- Select the
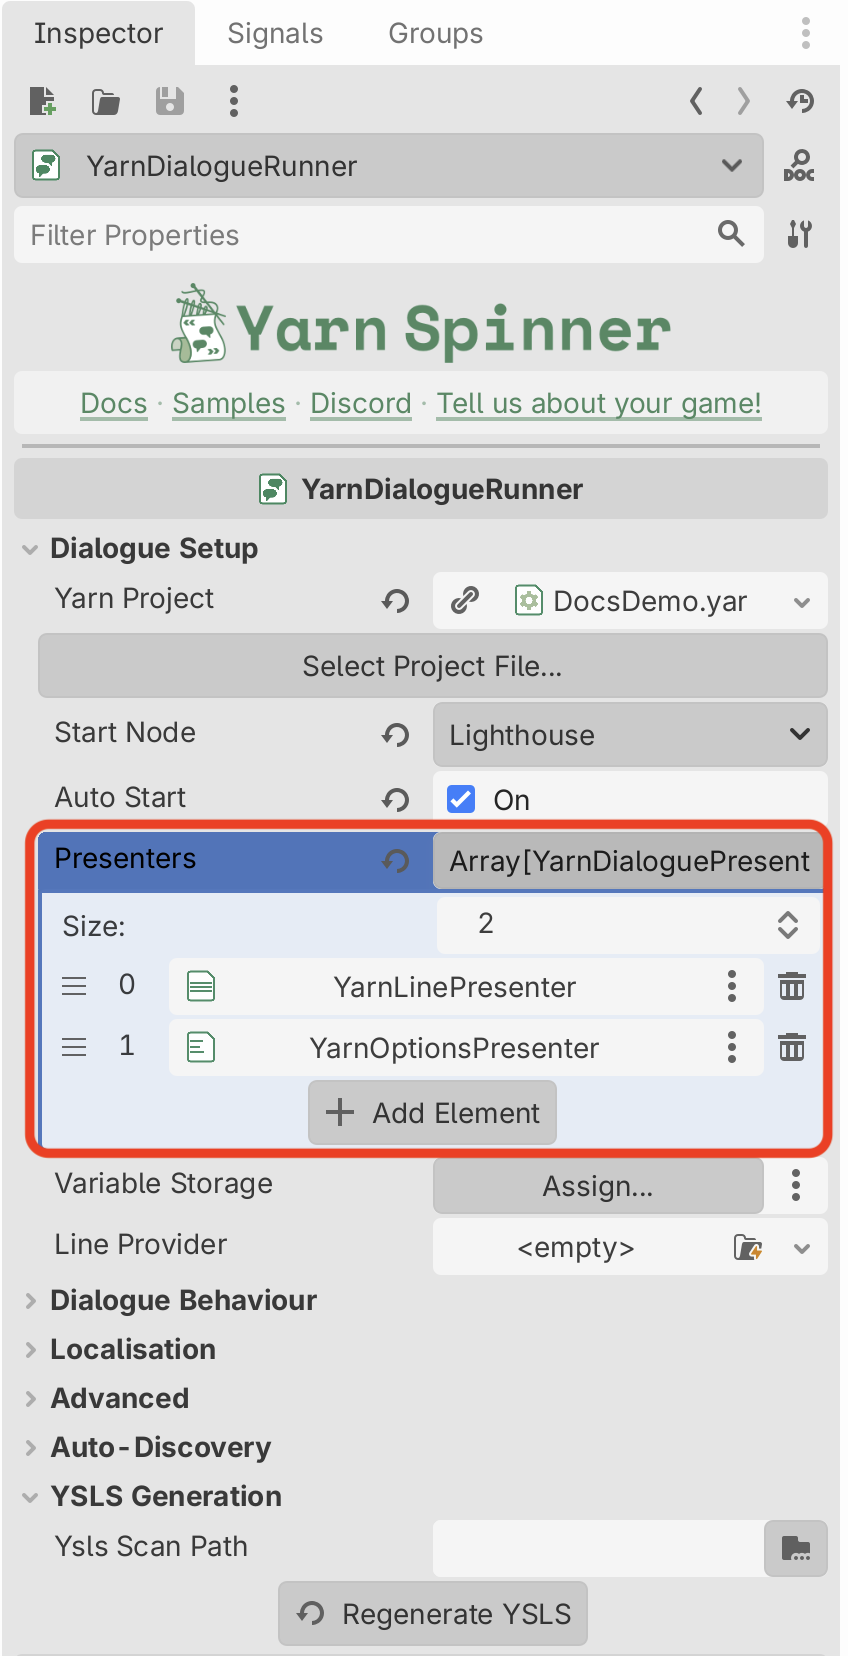
YarnDialogueRunner, and add both Presenters to its Presenters list: add two elements, then assign theYarnLinePresenterto one and theYarnOptionsPresenterto the other.
The label names matter. The Line Presenter uses the first RichTextLabel it finds for the line’s text, a Label with “character” in its name for the speaker, and a node with “continue” or “indicator” in its name for the continue prompt. Each Presenter shows and hides the nodes under it, so you don’t need to hide the panel yourself.
The Dialogue Runner only talks to Presenters in its Presenters list. It doesn’t look through its children for them, so a Presenter that isn’t in the list is never used. From code, you can add and remove Presenters with add_presenter() and remove_presenter().
Line Presenter and Options Presenter explain how to name the labels differently, change how text appears, and style the option buttons.
Run the scene to play the conversation:
Dialogue Setup
| Setting | What it does |
|---|---|
| Yarn Project | The compiled Yarn Project to run. |
| Start Node | The node to start from when you don’t name one. Defaults to Start. |
| Auto Start | Starts dialogue from Start Node as soon as the scene loads. Off by default. |
| Presenters | The Dialogue Presenters that show your dialogue. |
| Variable Storage | Where your Yarn variables are kept. Leave it empty and the Dialogue Runner creates one that keeps them in memory. See Variables and Storage. |
| Line Provider | Looks up the text for each line, including translations. Leave it empty to use the default. See Line and Asset Providers. |
Starting and stopping dialogue
Turn on Auto Start and the dialogue starts on its own when the scene loads, from the node set in Start Node.
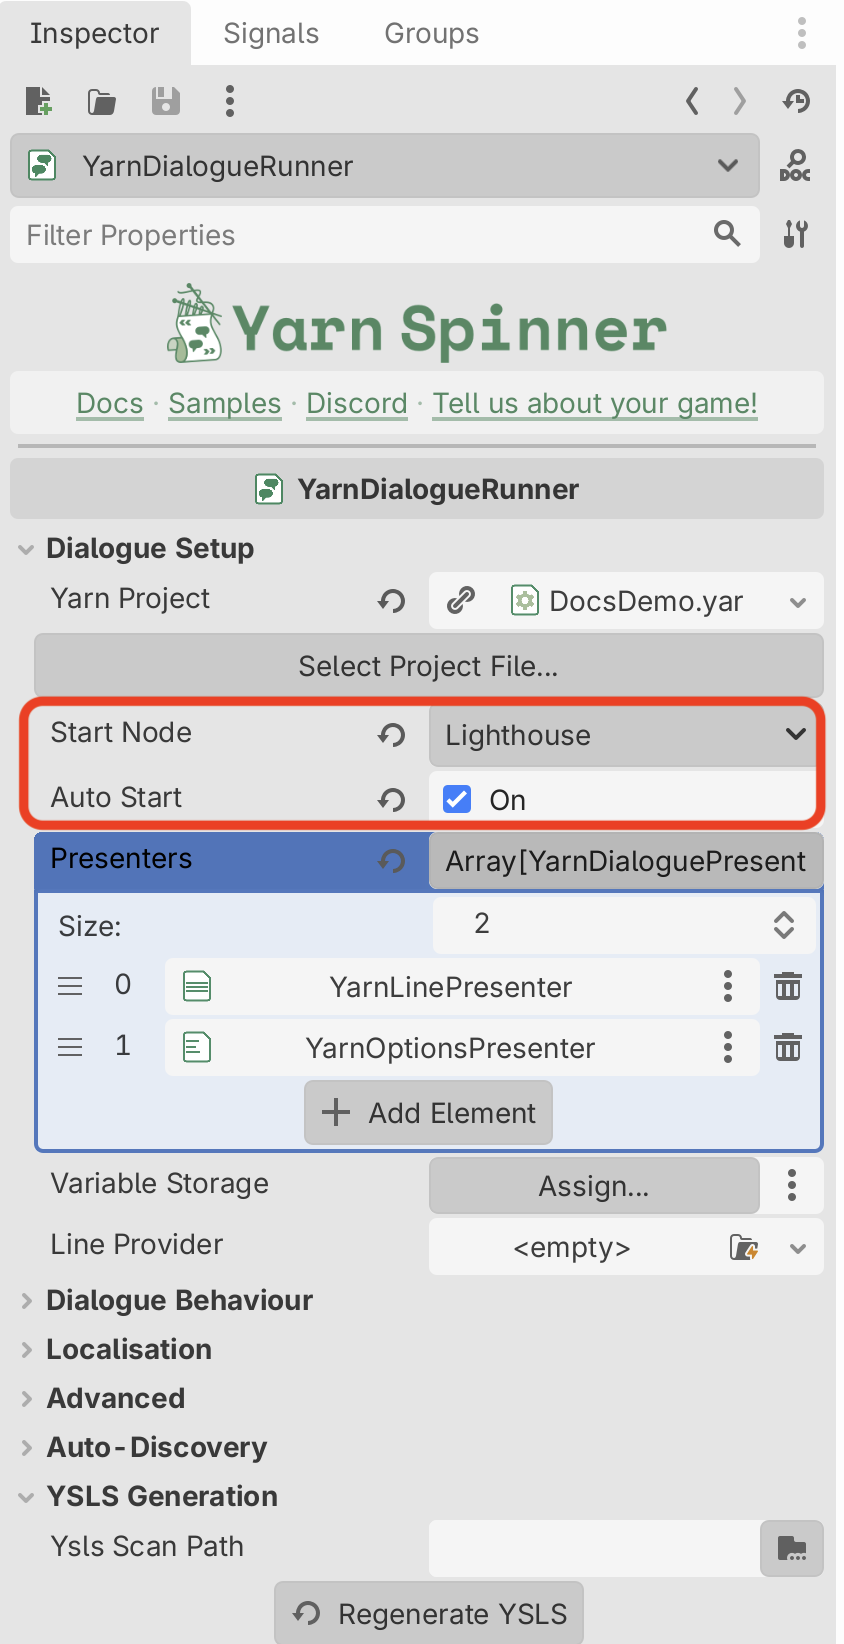
Otherwise, start it from your own code, for example when the player talks to a character:
extends Node2D

@onready var dialogue_runner: YarnDialogueRunner = $YarnDialogueRunner

func talk_to_rosa():
dialogue_runner.start_dialogue("Lighthouse")start_dialogue() with the name of the node to start from, for example when the player walks up to Rosa and presses a button.start_dialogue(node_name)starts from the node you name. Leave out the name to use Start Node. If dialogue is already running, it stops first and then starts the new node.stop_dialogue()ends the dialogue immediately.is_running()returns whether dialogue is running. Use it to stop the player walking off mid-conversation.
Signals
The Dialogue Runner emits these signals as the dialogue runs:
| Signal | When it’s emitted |
|---|---|
dialogue_started | Dialogue has started. |
dialogue_completed | Dialogue has ended, for any reason. |
dialogue_cancelled | Dialogue ended before it finished: it was stopped, restarted, or hit an error. Emitted immediately before dialogue_completed. |
node_started(node_name) | The Dialogue Runner has entered a node. |
node_completed(node_name) | The Dialogue Runner has left a node. |
command_received(command_name, command_args) | A Command is about to run. |
command_unhandled(command_text) | A Command didn’t match anything you’ve registered. See Commands. |
For example, to stop the player moving while they’re in a conversation:
func _ready():
	dialogue_runner.dialogue_started.connect(func(): player.can_move = false)
dialogue_runner.dialogue_completed.connect(func(): player.can_move = true)How it works with Presenters
When the Dialogue Runner reaches a line, it gives the line to every Presenter in its list at the same time. It waits until all of them have finished with it, then moves on. A Line Presenter and a Voice-Over Presenter can work on the same line, and the Dialogue Runner continues only once the text has been dismissed and the clip has finished.
When it reaches a set of options, it gives them to every Presenter in the same way, and uses the first option any of them picks.
The Line Presenter tells the Dialogue Runner to move on when the player continues. If you’re building your own controls, call these yourself:
request_hurry_up()asks the current line to finish appearing at once, such as by skipping the typing effect. The line stays on screen.request_next_content()asks the Presenters to finish with the current line and move on.
Dialogue Behaviour
The settings under Dialogue Behaviour in the Inspector change how options work.
| Setting | Default | What it does |
|---|---|---|
| Allow Option Fallthrough | On | If none of your Presenters picks an option, carry on with the dialogue after the options. |
| Option Timeout | 0 | How many seconds the player has to pick an option. When the time runs out, the dialogue carries on after the options. 0 means no time limit. |
| Show Selected Option as Line | Off | After the player picks an option, show its text as a line of dialogue before continuing. |
Other settings
The Dialogue Runner’s other groups in the Inspector are explained on other pages:
| Group | What it’s for |
|---|---|
| Localisation | The prefix used for your lines in Godot’s translation system. See Localising Your Game. |
| Advanced | Verbose Logging prints details of what the Dialogue Runner is doing to the Output panel, for tracking down problems. Saliency Strategy is covered in Saliency and Storylets. |
| Auto-Discovery | How the Dialogue Runner finds your Commands and Functions. See Commands. |
| YSLS Generation | Only used in the editor, for VS Code autocomplete. See The .ysls.json file. |
Saving and loading
The Dialogue Runner can save your Yarn variables to a file in Godot’s user:// folder, and load them back:
dialogue_runner.save_state_to_persistent_storage("dialogue_save.json")
dialogue_runner.load_state_from_persistent_storage("dialogue_save.json")Both return true if they worked. See Variables and Storage for other ways to save your variables along with the rest of your game.